Frequency Masking Explained: Complete Guide for Producers
Ever wondered why your mix sounds muddy, even after hours tweaking EQ? It's probably frequency masking sneaking in and burying your sounds. This guide breaks it down and arms you with pro techniques to carve out crystal-clear mixes.
Why Frequency Masking Kills Your Mix Clarity
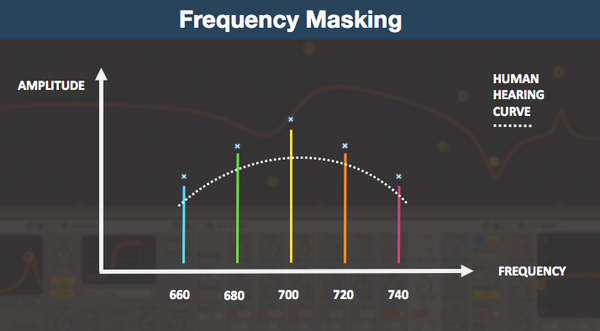
In electronic music production, every element needs to shine. When sounds fight over the same frequencies, one gets lost in the mud. Frequency masking happens when two or more sounds occupy overlapping frequency ranges at similar volumes, with the louder one dominating and leaving the quieter one ill-defined and weak.
Picture your kick drum battling the bass in the low end, or vocals getting swallowed by synth pads in the mids. This acoustic phenomenon is super common in dense electronic tracks. It robs your mix of power and punch, especially on club systems or streaming platforms where clarity rules.
Pros like Ufuk Onen from Production Expert point out that masking often hits the low-mids around 200-500 Hz, turning your track into a blurry mess. Fix it early, and your productions will translate everywhere from laptop speakers to festival PA systems.
How to Spot Frequency Masking in Your Tracks
Training your ears is step one. Solo pairs of clashing elements like kick vs. bass or snare vs. hi-hats. If one sounds muffled when played together, you've got masking.
Use low-pass or band-pass filters on your master bus to zoom in. Roll off everything above 200 Hz to check the low end. If it sounds muddy, kick and bass are fighting. Try the 2-5 kHz range for vocal-guitar clashes. Tools like spectrum analyzers in your DAW make hotspots glow bright.
Common culprits in electronic music:
- Kick vs. bass: Both thumping at 50-100 Hz.
- Vocals vs. keys/synths: Midrange pile-up around 1-4 kHz.
- Snare vs. cymbals: High-end overlap at 5-10 kHz.
- Pads vs. leads: Broad-spectrum smothering across mids.
Listen in mono too. Masking gets worse here, exposing issues that stereo hides. Reference pro tracks in your genre, like those crisp techno bangers, to benchmark clarity.
EQ Techniques: Carve Space Like a Pro
EQ is your first weapon against muddy mixes. Start subtractive: cut the non-priority element to make room for the star.
Prioritize ruthlessly. Vocals are king? Notch out 2-3 kHz from guitars or synths with a narrow Q. Boost the vocal subtly there if needed. For kick-bass wars, boost kick at 70 Hz and bass at 100 Hz. High-pass everything non-bass above 80-150 Hz to free the lows. Low-pass harsh highs on pads to protect cymbal sparkle.
Complementary EQ means reciprocal moves. Cut guitar at 250 Hz? Boost bass there slightly if it fits. Keep cuts surgical: 2-6 dB max to preserve tone. A/B test constantly, and use mid-side EQ for stereo tweaks.
In 2024, plugins like iZotope Neutron shine here with visual masking meters. They highlight clashes in real-time, perfect for electronic producers dialing in serum leads or massive sub-basses.
Dynamic Ducking and Sidechain Compression Tricks
Static EQ isn't always enough. Enter dynamic tools that react to the music.
Sidechain compression is gold for electronic genres. Route your kick to duck the bass: fast attack, medium release for pump without mud. Same for vocals over pads, or snare over synth stabs. Group guitars and sidechain them to a trumpet solo equivalent in your track.
Dynamic EQ takes it further. It only cuts when clashes happen, like bass mids ducking under kick hits. Plugins like FabFilter Pro-Q 3 or Oeksound Soothe2 automate this surgically.
Pro tip: Layer sidechain with multiband compression. Target specific bands, like low-end ducking only. This keeps your mix breathing naturally, ideal for house drops or drum & bass builds.
Stereo Imaging, Panning, and Advanced Unmasking
Don't sleep on the stereo field. Pan similar-frequency elements apart: left synth pad, right pluck. Avoid extremes to keep mono compatibility strong.
Saturation adds harmonics to shift energy. Tape or tube sat on bass brings midrange bite, helping it cut through kick without volume wars. Vocals get presence from subtle overdrive.
For next-level fixes, spectral unmasking tools like those in iZotope suite or Spectral Plugins Series automatically detect and separate clashes. In 2025, AI-assisted mixing is booming, making these accessible even for bedroom producers.
Arrangement matters too. Thin out mids in busy sections, or octave-shift conflicting synths. Sparse drops let elements breathe.
Your Workflow to Masking-Free Mixes
Follow this step-by-step:
- Rough balance levels and panning.
- Broad HPF/LPF sweeps.
- Subtractive EQ on clashes.
- Sidechain and dynamic EQ.
- Saturation and automation.
- Mono check and reference.
Start with a clean arrangement. Every mix benefits from holistic balance: prioritize leads, then glue the rest. Test on multiple systems.
Practical takeaway: Next session, solo your kick-bass duo. EQ carve, add sidechain, pan bass 10% left. Instant clarity boost.
Want pro plugins to speed this up? Check The Producer School's recommended bundles for EQ, dynamics, and spectral tools. Dial in pro mixes faster, and watch your tracks pop.
Sounds That Sit Right in the Mix
Our sample packs are designed with frequency separation in mind:
- Melodic Techno Sample Packs - Pre-EQ'd sounds that work together
- Serum Presets - Synth sounds designed for modern mixes